This article introduces how to create a blog site with Astro, a JavaScript-less static site generation engine. We’ll cover installation, configuration, and usage of Astro.
GitHub:
🚀🧑🚀 Keep your eyes to the skies, astronauts [withastro/astro: 🚀🧑🚀 Keep your eyes to the skies, astronauts](https://github.com/withastro/astro)
What is Astro (from GitHub):
- A fresh but familiar approach to building websites
- DX improvements of the component-oriented era
- Use your favorite JavaScript framework and automatically ship the bare-minimum amount of JavaScript—by default
withastro/astro: 🚀🧑🚀 Keep your eyes to the skies, astronauts
Installation
Below are the installation instructions for Astro.
Install Node.js
Use chocolatey to install nvm (Node.js version management system). This allows you to install any version of Node.js in later steps.
choco install nvm -y
refreshenv
For an overview of what chocolatey is and how to install it, please see the following.
Installing chocolatey on Windows 11
Use the installed nvm to install Node.js version 14.13.1 with the following command. Astro doesn’t seem to specify a particular Node.js version, but we confirmed it works with Node.js version v14, so we’ll proceed with this version.
nvm install 14.13.1 Confirm that Node.js is installed.
> C:\ProgramData\nvm\v14.13.1\node64.exe -v
v14.13.1
Create and navigate to any directory. Initialize a Node.js project with the npm init command to create a package.json file.
cd C:\pg\node\_win_v14.13.1_dev\
C:\ProgramData\nvm\v14.13.1\npm.cmd init
Install Astro
According to the GitHub documentation above, rather than installing the Astro package with npm install,
it’s recommended to run the npm init astro command which automatically handles configuration and file generation.
C:\ProgramData\nvm\v14.13.1\npm.cmd npm init astro

# or

npm init astro
You can choose from several project types to generate: starter (general), blog, documentation, portfolio, minimal, etc. Here, let’s select blog as an example.
(Installing Astro with npm init astro)
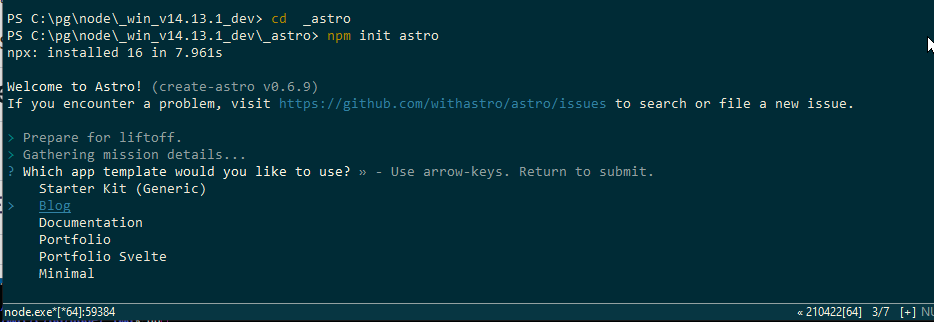
(Installing Astro with npm init astro / Project selection: starter (general), blog, documentation, portfolio, minimal)
This generates project files with the following structure.
.
├── README.md
├── astro.config.mjs
├── package-lock.json
├── package.json
├── public
│ ├── assets
│ ├── favicon.ico
│ ├── social.jpg
│ └── social.png
├── sandbox.config.json
├── src
│ ├── components
│ ├── layouts
│ ├── pages
│ └── styles
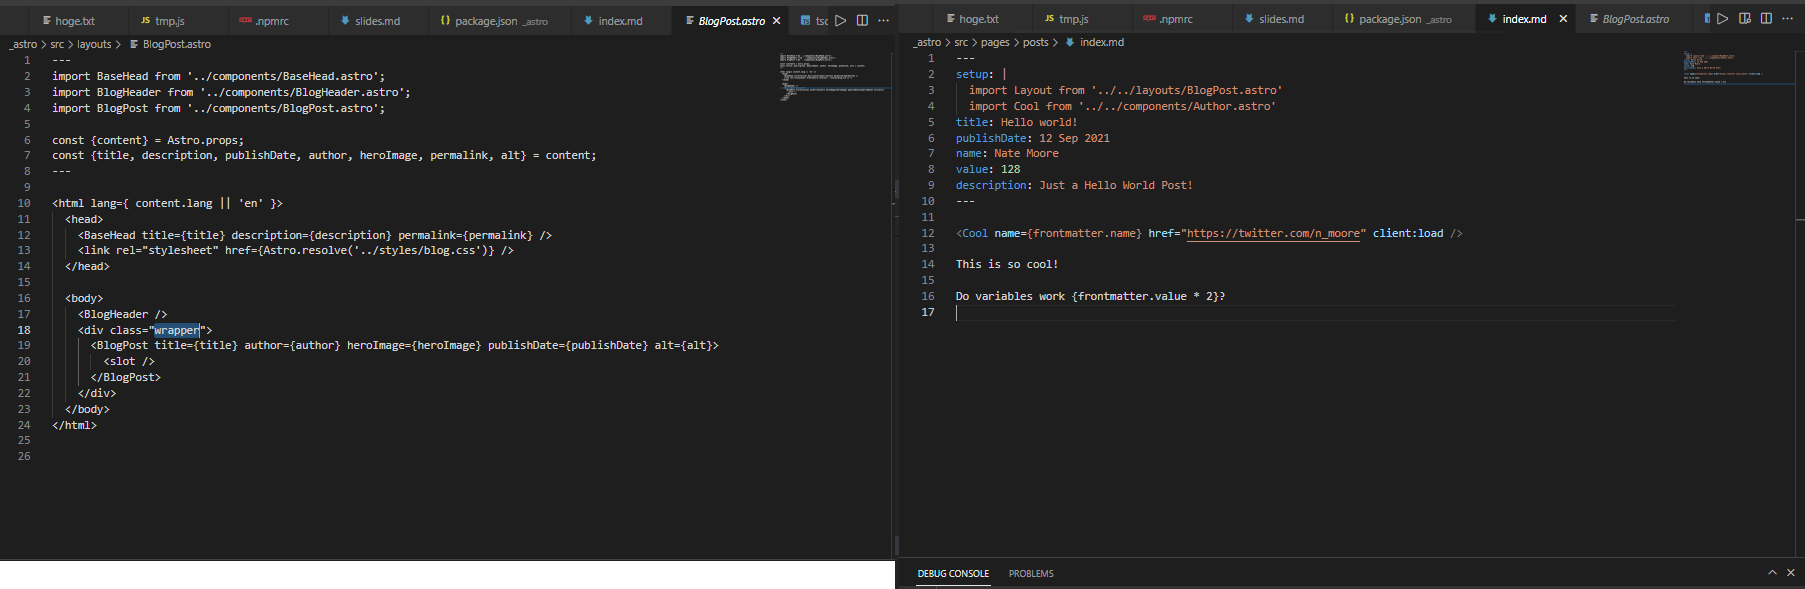
└── tsconfig.jsonThe initial ./src/layouts/BlogPost.astro file and ./src/pages/posts/index.md file look like this:
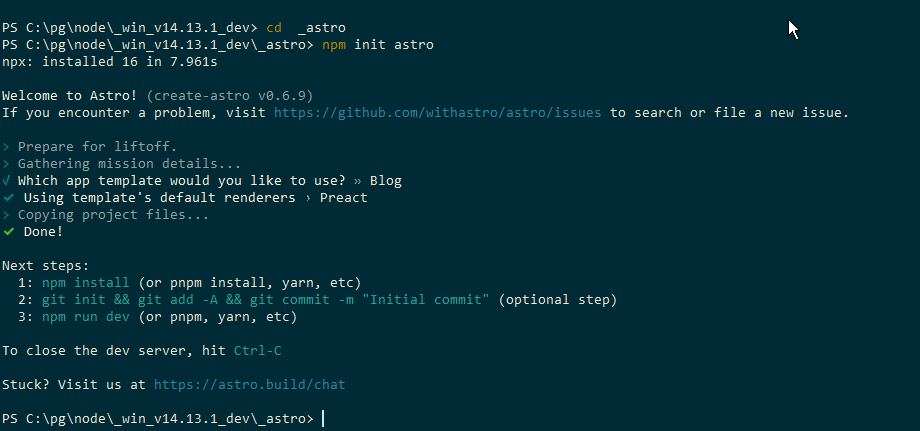
As seen in the “next steps” in the image above, the Node/npm packages in package.json are not yet installed, so let’s install them.
npm installRunning Astro
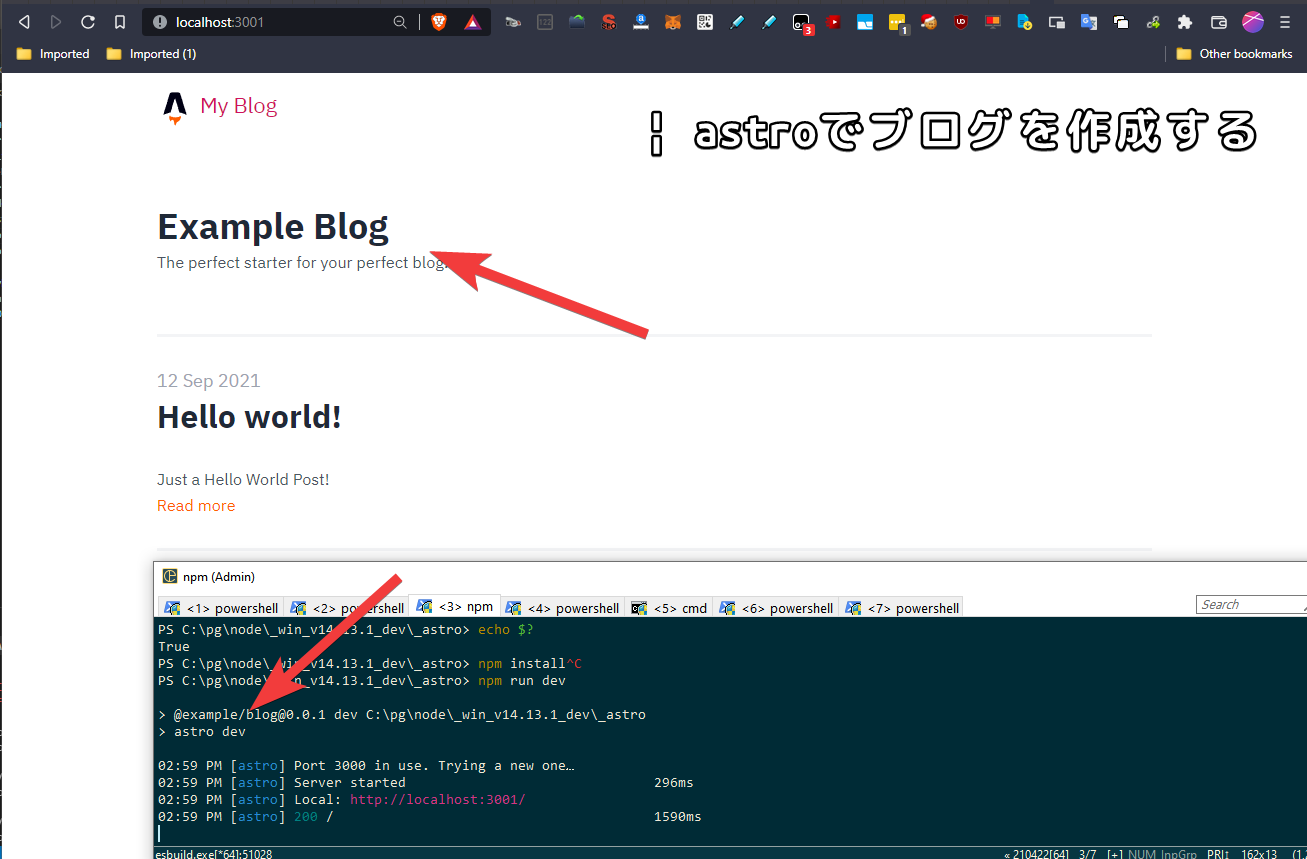
Start the development server with the following command:
npm run dev

# or

astro dev
The server starts, and you can view the site by opening the localhost address.
To build and generate static pages for pushing to GitHub Pages or deploying to a server, use the following command:
npm run build

# or

astro build
Summary
This article explained the steps to build a blog site using Astro, a JavaScript-less static site generation engine. Here’s a summary of the main points.
Astro is a tool that provides a new approach to building websites and offers component-oriented improvements. It uses your favorite JavaScript framework and automatically provides the minimum necessary JavaScript.
Installing Astro includes the following steps:
-
Install Node.js: Install NVM (Node.js Version Manager) using Chocolatey and select Node.js version 14.13.1. Astro may not require a specific Node.js version, but version 14 is suggested as it’s been confirmed to work.
-
Install Astro: Instead of installing Astro packages directly with npm, use the
npm init astrocommand to automatically set up the project and select the project type (e.g., blog). This generates the project file structure.
The project file structure includes astro.config.mjs, package.json, src directory, etc., and provides sample Astro components and content in the initial state.
- Install dependencies: Install project dependencies using the
npm installcommand.
To start the development environment for an Astro project, use the following commands:
npm run devorastro dev
This starts Astro’s development server and allows you to preview the site on localhost.
Finally, to build an Astro project and generate static pages, use the following commands:
npm run buildorastro build
Through this process, the basic steps for building, developing, and deploying a blog site using Astro are complete. This allows you to efficiently build static, high-performance websites.